
Are you interested in writing Python code on a Windows machine? Maybe you’re a lifelong Windows user getting into coding with Python, or perhaps you’re just beginning to branch out from macOS or Linux. In this tutorial, you’ll walk through an easy-to-follow and flexible Python coding setup on Windows 10.
Note: Most of the steps here will work equally well on Windows 11.
To set up your Windows machine for Python coding, you’ll:
Along the way, you’ll learn about various recommended tools for a complete, free, and mostly open-source Windows Python coding setup. You won’t get to know all the possible tools, but you’ll walk away with one setup that should be flexible enough for most situations.
If you’re a beginner to intermediate Pythonista, or you’re just looking to get set up on a Windows machine without having to think about all the different options out there, then this tutorial is for you.
Free Bonus: Click here to get our free Python Cheat Sheet that shows you the basics of Python 3, like working with data types, dictionaries, lists, and Python functions.
Maybe you’re in a rush to get set up. If that’s the case, then you’ll find what you need in the section on fast-tracking your setup, where you’ll examine a PowerShell script to automate the process almost entirely. Jump over there if you need to get up and running quickly. That said, going over the first section will give you a good checklist to start with to make sure you won’t run into any errors.
Say you’re sitting in front of a completely fresh Windows installation. In this section, you’ll go through the first steps that you should perform in that case. You’ll get an initial command line environment set up, install software via package managers, and configure essential Windows settings for a Python coding setup.
Note: If you’re going to be following along, you’ll be restarting your computer various times during this whole process. It’s worthwhile to have another device close by, not only for keeping this tutorial open, but for general queries, troubleshooting, and the ability to carry on reading other Real Python tutorials while waiting for updates or installations.
In addition to installing what you need, you’ll also learn how to get around some of Microsoft’s built-in programs that might get in the way. Your first step is to ensure that your Windows installation is up-to-date.
First, if your machine is new or you’ve disabled updates, then you’ll want to make sure your Windows installation is up-to-date. Updating is especially relevant if you want to use Windows Subsystem for Linux (WSL) and have Windows 10. It’s also a safeguard against the dreaded Windows auto-reboot.
Installing Windows updates can take an hour or two, but it’s relatively mindless. So if you’re starting here, line up some other tasks while waiting for the updates to complete.
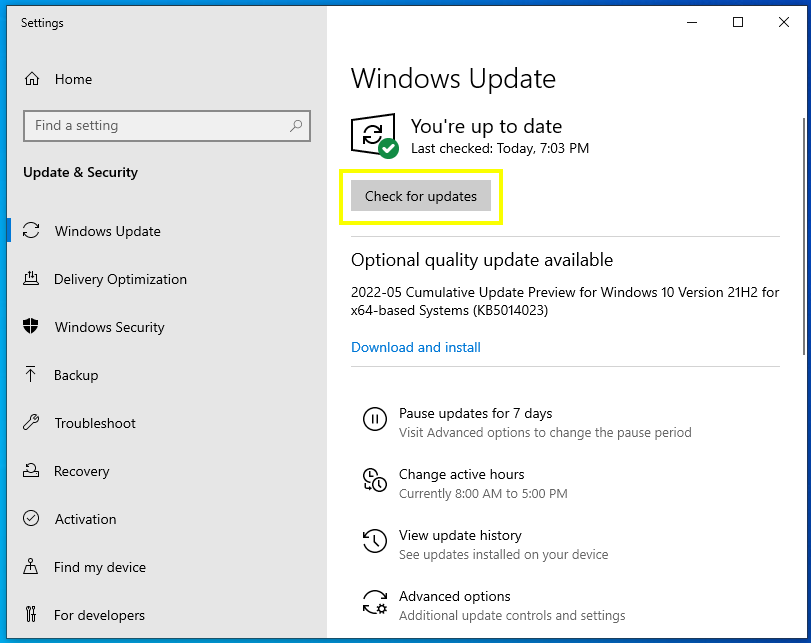
To start the update process, go to the Start menu and search for Windows Update. Once there, prompt Windows to search for, download, and install any updates it can find:
Once all the updates have been installed, you’ll probably be prompted to reboot the computer. Do this as many times as it asks you to.
You’ll probably have to repeat the update process two or three times. Once the first batch of updates have been installed and you’ve rebooted, if you go back to the update screen, then it’ll probably say that the system is up-to-date. However, if you wait a while and then check for updates again, it’ll likely find some more to install.
Once you have all the updates installed, then you’re ready to do the initial setup for the command line environment in your Windows Python coding setup.
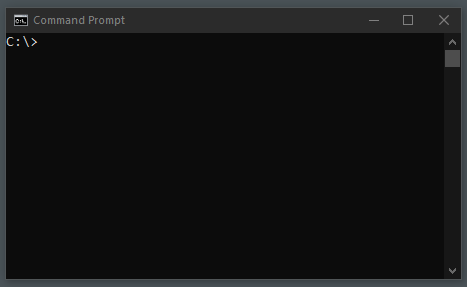
If you’ve always used Windows, then you may be used to using the Command Prompt and PowerShell through their own apps. Opening them this way may make you think that they’re self-contained programs. However, when you run these programs from the Start menu, two processes are running. One process is what performs the commands, and the other is a process to send your input and display the output.
The window that you see when you open the Command Prompt is the displaying process. The core of the Command Prompt is in the background awaiting your input that’s sent by the window. In this way, the window acts as a sort of host to the terminal.
For more information about the differences between command interpreters and interfaces, take a look at the introduction to the shell section in the article about the subprocess module.
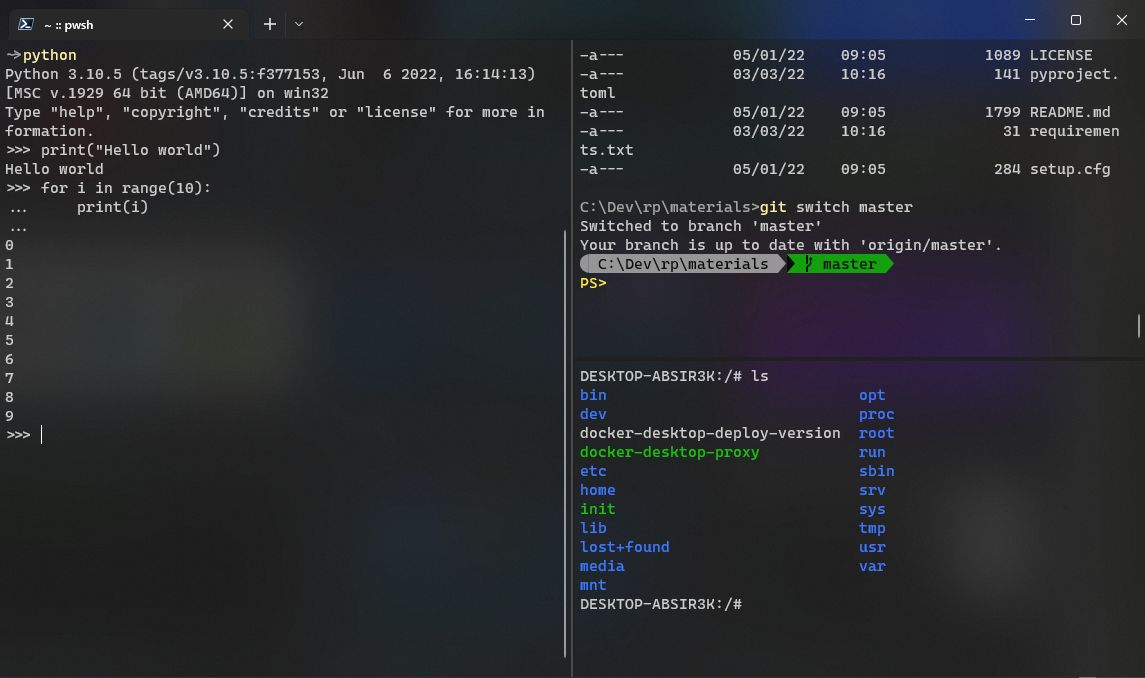
Windows has created a new, open-source Windows Terminal to be a universal console host. It acts as an interface to multiple shells, allowing you to start the Command Prompt, PowerShell, and any other shell that you might have available as different tabs in the same host:
Until the new Windows Terminal, many relied on other hosts, also called emulators, to manage their different shell sessions as tabs or as horizontal and vertical splits. One popular choice was ConEmu. ConEmu has more features than the Windows Terminal. However, Windows Terminal is catching up and has some features that ConEmu doesn’t, such as Unicode emoji support.
Note: You aren’t required to use Windows Terminal for this tutorial, but it’s recommended. It seems like in the UNIX world, it’s much more common for people to use the command line, and this is partly because of the nice features of the terminal emulators available.
Windows Terminal also has the advantage of having the development effort of the open-source community and Microsoft behind it. Windows Terminal is improving and adding features surprisingly quickly. Crucially, for this tutorial, Windows Terminal is a lot easier to set up than ConEmu, so if you’re following along, move on to the next section to install Windows Terminal.
For this tutorial’s setup, you should install the Terminal app from the Microsoft Store, accessible from the Start menu. Installing it from the Microsoft Store has a few advantages. One advantage is that it ensures that updates come automatically. Another advantage is that it’s painless to install. Other sources seem to break relatively often, presumably because Windows Terminal is being developed very quickly.
Windows Terminal is the only app that you’ll install without the package manager that you’ll get to later in the tutorial. That said, hopefully soon you’ll be able to manage all your software under one package manager.
Once you’ve installed Windows Terminal with the Microsoft Store, you should be able to find it in the Start menu under Terminal. If, for whatever reason, you can’t install it from the Microsoft Store, try the releases page in the GitHub repository.
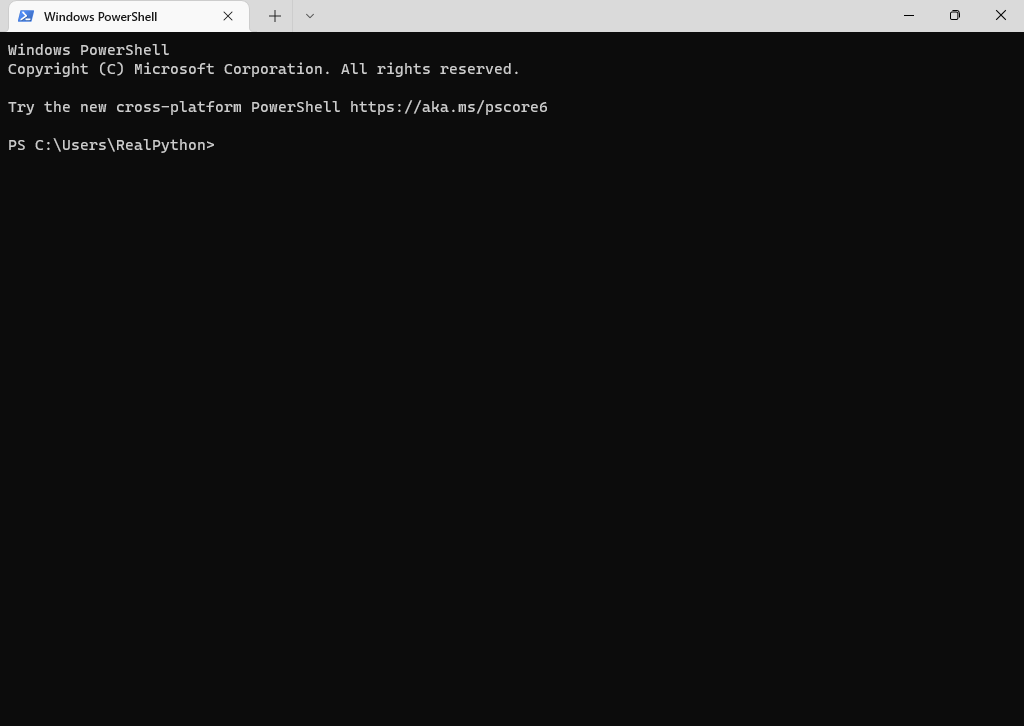
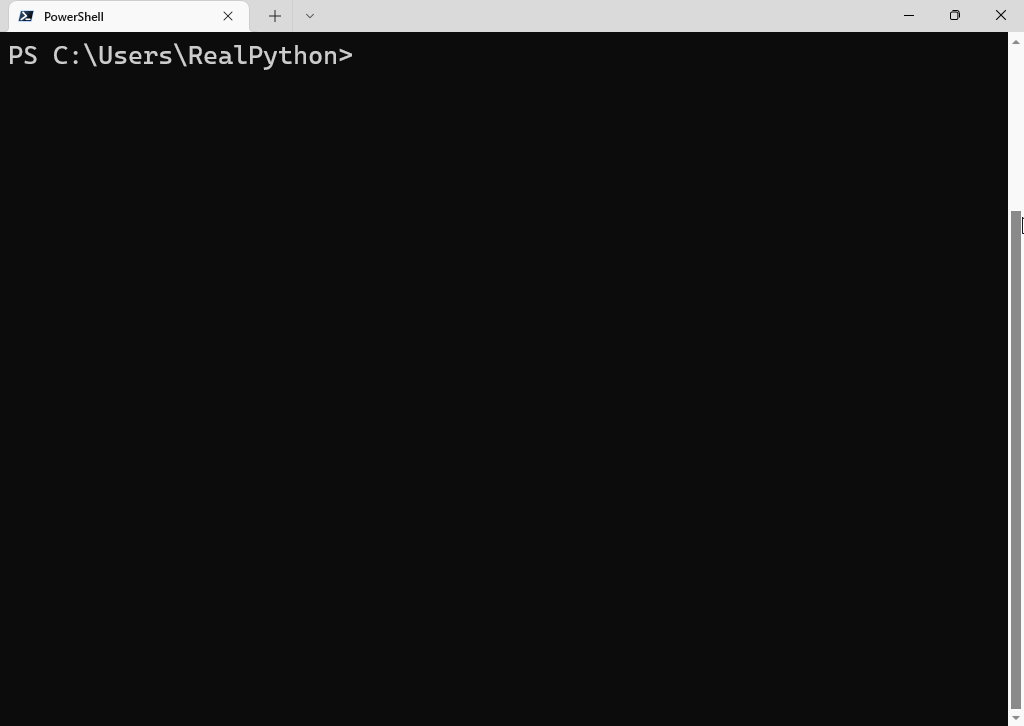
When you start Windows Terminal, it should automatically start up with a new PowerShell tab:
With that working correctly, you’ll be switching gears to perform some general Windows adjustments.
There are some general Windows settings that you’ll want to set to keep your sanity in check. This section contains some typical settings that Windows users will often immediately change when setting up Windows. Most of these settings are optional. Just make sure you do the first one listed, coming up next.
App execution aliases are a special kind of alias for Windows. For example, if you type python on the command line, Windows will automatically ask you if you want to install the Microsoft Store version of Python.
App execution aliases are a feature to make things easier to get started, but they can interfere with other programs. For instance, when you install pyenv for Windows and install a few Python versions, the app execution aliases will interfere by not allowing you to access those Python versions.
You can search for the app execution alias control panel from the Start menu. The entry is called Manage app execution aliases. Here’s a screenshot of that control panel:
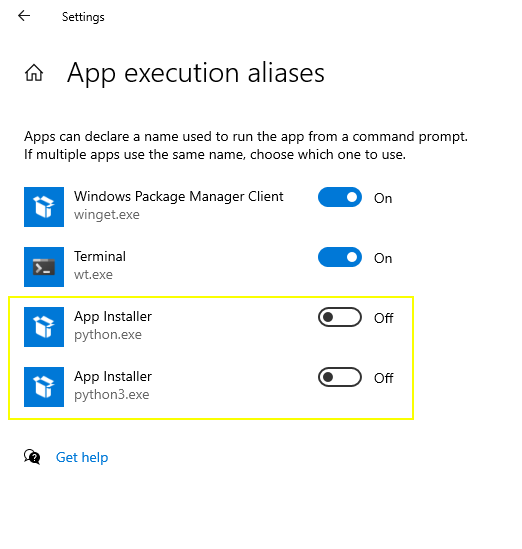
You can usually turn all of these off, as you already have the Path environment variable to make sure apps are available on the command line. More on environment variables are coming later in the tutorial. The essential ones to disable are the Python-related ones.
The rest of the settings in this subsection are optional but are recommended for quality of life.
It’s worth keeping Windows up-to-date, not only for security but for updates to all the developer tools like Windows Terminal and WSL. One Windows quirk that you’ll want to avoid is the auto-restart. For that, you can disable the option to restart your device with the Advanced Windows update options control panel:
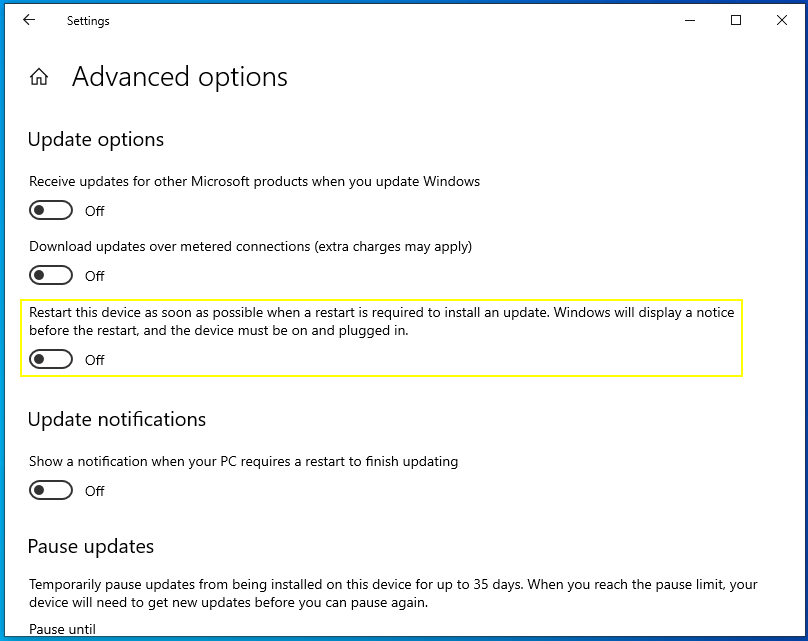
Here, you’ll want to disable the option to restart your device as soon as possible after installing a new update. This setting is what typically causes the dreaded Windows auto-restart.
Disabling the auto-restart function is still not watertight, though. You’ll want to reboot Windows every few days, or every week at least, to be safe. If there’s one thing that UNIX systems seem to be far better at, it’s being able to go without a reboot for ages.
In an attempt to make Windows Explorer easier to use for non-developer types, it hides some information that you’ll probably want to see, so you should enable the following:
You can access these options from the file explorer, which you can open with Win + E , click on the File tab in the top left, and choose Change folder and search options. Under the View tab, you’ll be able to find these settings:
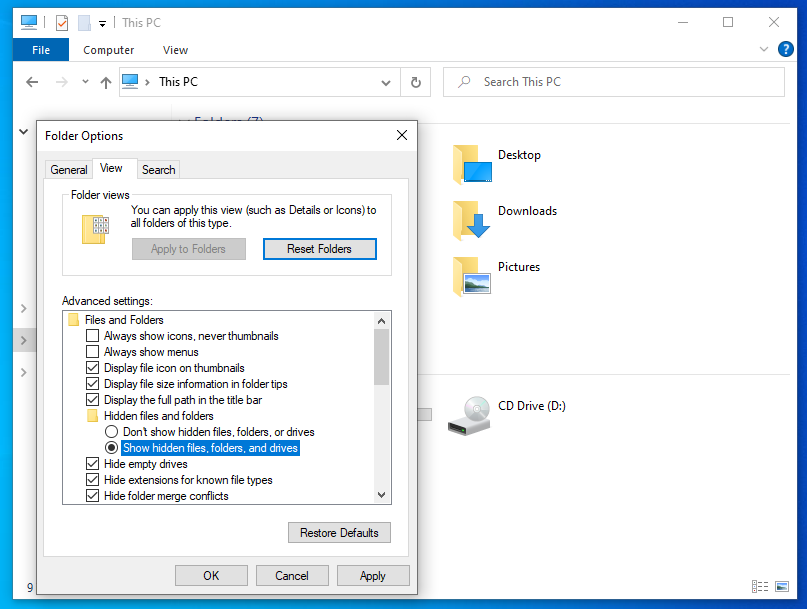
With those settings adjusted, you’ll be able to see the previously hidden files and file extensions.
The default option for most Windows users when installing software is to go to a website, download an executable, and run it. The executable is typically a Windows Installer Package with an .msi file extension. Then you’ll be presented with a User Account Control (UAC) screen, asking you for permission to make changes to your device:
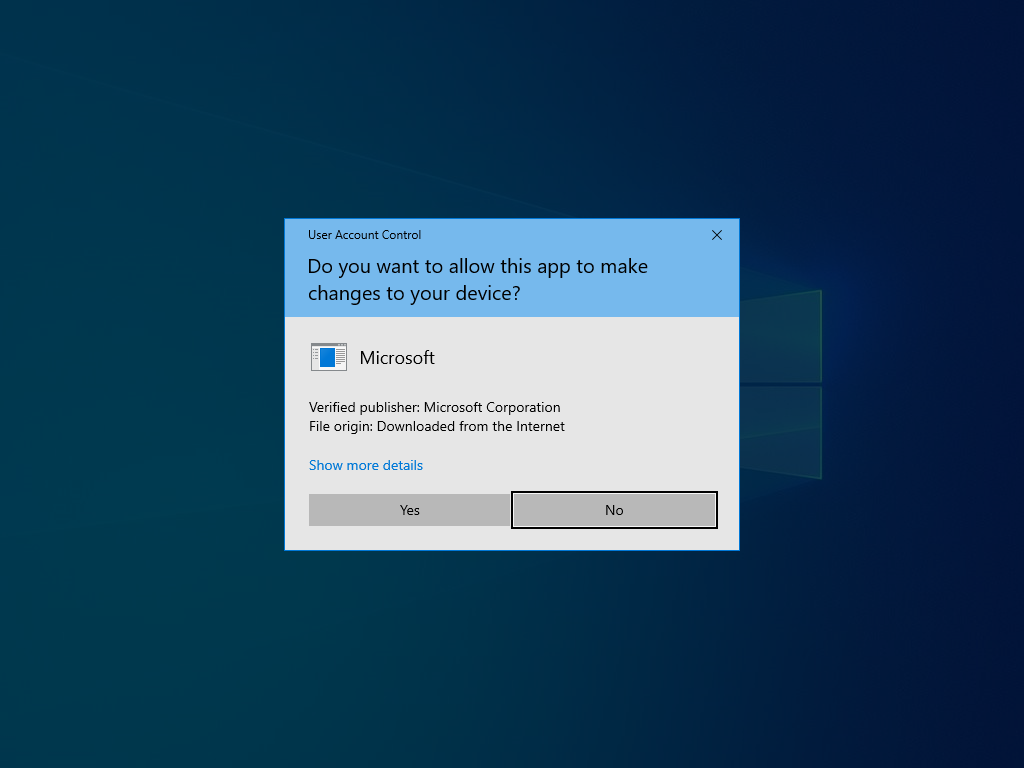
If that wasn’t enough, you then have to read a license agreement, click OK a bunch of times, and then close the installer. There must be a better way!
On UNIX-based systems, you get nice things called package managers, like Homebrew, apt , dnf and pacman . Why can’t Windows have those? Well, Windows does have a few package managers to choose from, the most popular of which is Chocolatey.
Windows package managers aren’t quite as advanced as their UNIX-based equivalents. However, they’re a massive step in the right direction for people who like to get stuff done.
Microsoft is developing its package manager, winget . While it’s good and getting better fast, it’s still not the most popular package manager for Windows and doesn’t have nearly as many packages to choose from as Chocolatey.
Before installing Chocolatey, there are a few things that you’ll need to do first.
To install Chocolatey, you’ll want to first open up Windows Terminal, or your terminal program of choice, as an administrator.
Note: To launch programs as an administrator, you can search for the app in the Start menu, and then right-click on it, and choose Run as administrator.
To run a program as an administrator is also referred to as running an elevated instance of the program. It can also be called running a program with elevated privileges.
Once you have an administrator terminal session open, you should be presented with a PowerShell tab.
To be able to install Chocolatey effortlessly, and for the automation script later in the tutorial, you’ll need to set your execution policy to something less strict than the default.
The execution policy sets how strict your system is about running scripts from other sources. For this tutorial, you’ll want to set it to RemoteSigned :
Windows PowerShellPS> Set-ExecutionPolicy RemoteSigned Execution Policy Change The execution policy helps protect you from scripts that you don't trust. . Do you want to change the execution policy? [Y] Yes [N] No [S] Suspend [?] Help (default is "Y"): y You may not see the warning, because the execution policy might already be set. To double-check your setting, you can run Get-ExecutionPolicy . Once you have the correct execution policy, then you’re ready to download and run a script that’ll install Chocolatey.
To run the Chocolatey install script and to run the automated setup script that you’ll be looking at later in the tutorial, you can make a request to a hosted version of the script.
Note: You’ll always be told to check the sources for remote scripts before running them, as malicious actors can exploit this technique.
For example, if someone were to hack the community.chocolatey.org/install.ps1 URL and replace it with a malicious script, this could wreak havoc on your machine. So, be careful to check that the source hasn’t been compromised.
To run the hosted version of the installation script, you can run this command:
Windows PowerShellPS> iwr -useb community.chocolatey.org/install.ps1 | iex iwr is an alias for Invoke-WebRequest , and -useb means to use basic parsing, which downloads and parses the script from community.chocolatey.org/install.ps1 . The result of this is the script text, which is then piped ( | ) into iex , which is an alias for Invoke-Expression , which runs the script. The script installs Chocolatey.
Once the installation is done, you should be able to call choco from the same prompt. However, the command is not always available from the same prompt after installation. In that case, you can restart the terminal, ensuring it’s still in administrator mode for what’s coming up in the tutorial. If that also fails, reboot your system to refresh the environment.
With Chocolatey installed, you’re ready to manage almost all your software with simple commands. Remember that to install, upgrade, and uninstall software, you’ll need to start the Terminal session as an administrator.
Note: Having to start the whole program as an administrator can be a bit of a hassle. Usually, you only want to run a handful of commands as an administrator, so having to start the whole program in administrator mode often feels a bit overkill.
In UNIX environments, there’s a handy sudo command that you can prefix to any command to run that particular command with elevated privileges. This command would be ideal for installing packages, if only it were available on Windows.
Fortunately, you can install a package called gsudo, which allows almost this exact functionality. You’ll still have to click on the UAC screen, but you won’t need to open a whole new program instance to install something.
However, installing gsudo isn’t necessary to follow this tutorial.
Try starting an elevated Terminal session, and then install a package of your choice from the online package search. The install command is demonstrated below with 7zip, an open-source file archiver:
Windows PowerShellPS> choco install 7zip 7zip.install v22.0 [Approved] 7zip.install package files install completed. Performing other installation steps. The package 7zip.install wants to run 'chocolateyInstall.ps1'. Note: If you don't run this script, the installation will fail. Note: To confirm automatically next time, use '-y' or consider: choco feature enable -n allowGlobalConfirmation Do you want to run the script?([Y]es/[A]ll - yes to all/[N]o/[P]rint): At the confirmation prompt, type Y and press enter. Chocolatey will then install the package. If you want to disable the behavior of double-checking if you want to install a package, then you can send this command:
Windows PowerShellPS> choco feature enable -n allowGlobalConfirmation Now the installation process won’t prompt you with the annoying Are you sure? type of prompts. That said, you can also pass in this option for each install command by adding the -y flag.
If you want to search available packages from the command line, then you can do that with the choco search [keyword] command. To see a list of your installed packages, you can use the choco list command with the --local-only flag. Finally, to upgrade and uninstall, there are choco upgrade and choco uninstall commands for that too:
Windows PowerShellPS> choco upgrade [package-name] PS> choco upgrade all # keyword to try upgrade all packages PS> choco uninstall [package-name] Note that upgrading all packages might take a while.
You’re now ready to start using Chocolatey by installing a small set of software to help you clean up and uninstall any bloatware that may have come preinstalled on your system.
Once you have your package manager, one of the first things you may want to do with a fresh install is to clean it up. This section is optional and may not even be necessary for your system.
If you’ve installed Windows from a Microsoft image, then there’s probably not much to remove. If your PC came preinstalled, then it’s potentially filled with a bunch of bloatware.
For instance, manufacturers often include third-party antivirus software but may not deactivate Windows Defender. Having more than one antivirus software can cause strange problems and significantly impact your PC’s performance. Besides, Windows Defender or Microsoft Defender is safe, so if you don’t need the additional antivirus for any particular reason, you can rest assured that the built-in antivirus is adequate to keep you safe.
To start off with an immaculate install on a preinstalled system, some would even go as far as to reset the Windows installation completely. This option is available via the Start menu by searching for reset. However, this nuclear option can turn out to be a hassle because your machine may require special drivers that the Windows install process doesn’t have access to.
It’s also inevitable that at some point, you’ll install something that didn’t turn out to be what you wanted. Perhaps it was a package that wasn’t available on Chocolatey, or you just forgot to use Chocolatey. Or, to your horror, you clicked a suspect link and installed some persistent spyware.
To clean up and remove programs, you might want a decent uninstaller, ideally one that’ll let you uninstall in bulk and will also do the extra work of cleaning up files and folders that sometimes get left behind.
Spyware, malware, and adware that slip through the cracks are especially good at leaving behind services that reinstall themselves once you’ve supposedly uninstalled them.
Bulk Crap Uninstaller or BCU, is a fantastic open-source uninstaller that’ll seek out all sorts of programs and purge them:
Windows PowerShellPS> choco install bulk-crap-uninstaller Once it’s installed and open, it’ll allow you to select multiple programs and automate the uninstallation and cleanup process as much as possible:
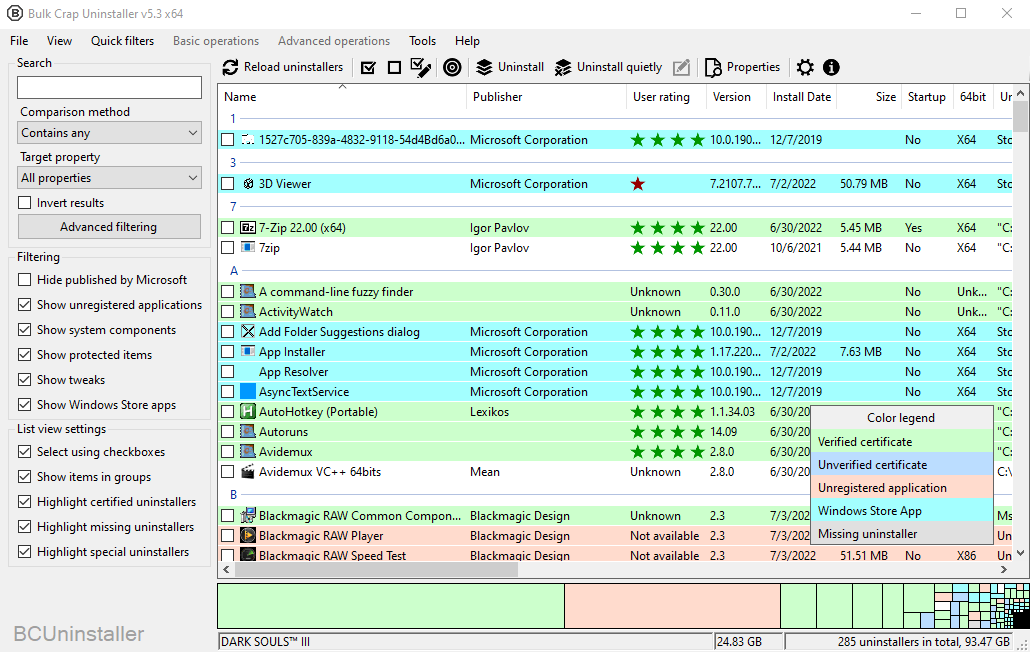
BCU will detect which uninstallation processes can’t be automated and uninstall those first. Then it’ll let you know that all the rest of the programs can be uninstalled without your intervention.
After the main uninstall process, BCU will perform a deep clean, showing you leftover files, services, and registry entries that you may want to delete.
Note: Be careful when removing registry entries, as this can affect other programs!
Other free options are available, such as Geek Uninstaller, which is generally faster if all you’re looking to do is uninstall one or two programs.
Note: If you see some programs that are already installed on your system but have Chocolatey packages available, it might be worth uninstalling them and reinstalling them with Chocolatey. Once programs are all under the same package manager, updating and uninstalling them is far more manageable.
Some programs are very difficult to uninstall because they’re deeply embedded into Windows. If you want to minimize their presence, then you may also want to play around with Winaero Tweaker:
Windows PowerShellPS> choco install winaero-tweaker Winaero Tweaker is a utility that’ll allow you to change a bunch of settings that are either not accessible with the Settings app or are very difficult to change. For example, it can disable Cortana and OneDrive if you don’t intend to use them.
Note: After you’ve installed your browser and other software, you may want to open the Default apps control panel, also searchable from the Start menu, and set your preferred applications as default.
One change that’s common to make is changing the default browser from Edge. Windows will make one last-ditch attempt to convince you to use Edge, but press boldly ahead if you prefer another browser!
Once you’re done with general cleaning, it’s time to dig in further and explore the Windows command line experience.
The classic Windows command line experience is associated with the command prompt, also known as cmd.exe :
But times have moved on, and these days you’ll want to use PowerShell Core, a cross-platform, object-oriented shell that can do much more than the Command Prompt.
PowerShell was designed by Microsoft, with Bruce Payette at the helm, to be a powerful and relatively easy-to-understand tool to help with all aspects of managing a Windows machine. It’s a shell, a scripting environment, and an automation tool. It can be used for everything from personal scripts up to DevOps.
PowerShell does get a bit of a bad reputation for being strange and verbose, but it’s a compelling system that can get a lot done. It just takes a little getting used to.
On Windows 10, Windows PowerShell comes installed by default. However, the newer PowerShell Core doesn’t. Windows PowerShell became PowerShell Core starting with version 6, and that’s when it became a cross-platform shell and open source to boot.
Since PowerShell Core doesn’t come with Windows 10 by default, you’ll want to install it.
Now you’re ready to install the latest version of PowerShell Core with Chocolatey:
Windows PowerShellPS> choco install powershell-core Once that’s done, you should now be able to call pwsh to start a PowerShell Core session. If that doesn’t work, try the command refreshenv , and if that fails, restart the terminal session:
Note that when you upgrade PowerShell Core, you’ll want to update from another shell, such as the old Windows PowerShell, which will still be available, or the Command Prompt. Trying to replace an in-use PowerShell Core can be problematic. So when you upgrade it, ensure that all PowerShell Core instances are closed.
Note: You don’t strictly need PowerShell Core for this tutorial, as Windows PowerShell will work for what you’ll cover here. That said, you might as well be using the latest, most fully-featured version. There is, after all, growing demand for PowerShell skills in the industry!
Now that you have the latest version of PowerShell Core installed, you’ll be able to use it to do all your typical shell-based tasks.
PowerShell Core has a lot of functionality, but you don’t need all of it; heck, you don’t even need a fraction of it. Below are some of the most common commands for navigating and managing your file system:
| Alias | Full PowerShell Command | Explanation | Bash Equivalent |
|---|---|---|---|
| ls | Get-ChildItem | List the contents of the current working directory | ls |
| cd | Set-Location | Change your current working directory | cd |
| rm | Remove-Item | Delete an item | rm |
| rm -recurse -fo | Remove-Item -Recurse -Force | Delete a folder recursively | rm -rf |
| mkdir | New-Item -ItemType Directory | Create a new directory | mkdir |
| ni | New-Item -ItemType File | Create a new file | touch |
| cat | Get-Content | Print the contents of a file to the screen | cat |
You’ll see that it’s not so different from a typical POSIX shell, like what you find on UNIX-based systems like Linux or macOS.
If you’re confused by PowerShell, the confusion often stems from the fact that PowerShell, like Python, is very object-oriented, while most shells are purely text-based. Once you start getting your head around the change, it makes a lot more sense.
If you’re interested in learning more about PowerShell, Bruce Payette himself wrote Windows PowerShell in Action. Even though the book uses Windows PowerShell, it’s great for a general introduction.
Now that you’re whizzing around the command line, there are things that you might want to alias yourself to customize your experience and make it better for your workflows.
One task that you’ll want to do at some point is to configure your PowerShell profile. The profile isn’t necessary, but it’s a great tool to take advantage of. Your profile is a PowerShell script that you use to configure your command line environment—it’s the PowerShell equivalent of a Bash .bashrc file.
Whenever you start a new PowerShell session, the profile script will run. If you have more than one machine, then it’s a great document to back up and share across all of them. The profile is also great for initializing a new machine. That way, you get all your shortcuts and custom functions from the get-go.
Note: Windows PowerShell has its own profile location, which won’t be affected by the PowerShell Core profile.
First off, you’ll need to create the profile because it’s not created by default when PowerShell Core is installed:
Windows PowerShellPS> ni -Force $PROFILE This command uses the ni command, an alias for New-Item . It uses the $PROFILE PowerShell variable, which points to the path where PowerShell will look for a profile. The -Force flag is used because PowerShell may need to create some directories along the way.
Note: PowerShell variables are preceded with a dollar sign $ .
Once you’ve created the profile, you can open it with Windows Notepad:
Windows PowerShellPS> notepad $PROFILE Once it’s open, add any PowerShell commands that you want to it. For example, you can set aliases for programs you use often:
PowerShell Script# Microsoft.PowerShell_profile.ps1 Set-Alias n notepad In this case, n will become aliased to the command notepad . So if you want to open up notepad, now you can just type n . Note that any changes you make to the profile will only be apparent in the next session that you start up.
You can also add functions to your profile:
PowerShell Script# Microsoft.PowerShell_profile.ps1 function grep $input | out-string -stream | select-string $args > If you come from a UNIX background, grep may be a welcome utility to find on Windows! It’s a way to filter many lines of output. For instance, if you’re listing a large directory and want to show only lines that contain a specific string, then you can use this utility like this:
Windows PowerShellPS> ls large-directory | grep python This command lists the contents of a large directory and only shows lines that contain the string python .
Note: Another up-and-coming package manager that works slightly differently is Scoop. Scoop mainly focuses on command-line tools.
Scoop is a great source for ported UNIX command-line tools like grep , less , cowsay , and more. So if you come from a UNIX background and miss certain command-line tools, Scoop is worth checking out.
PowerShell also has a module system to extend and customize your command line experience, and in the next section, you’ll get a few recommendations for handy modules to install.
PowerShell has a rich ecosystem of optional modules that you can install to enhance your command line experience further. Here’s a list of a few very useful, but entirely optional, ones:
You can install these modules with the Install-Module command, though each of the links will have more information about how to install it and set it up properly.
You’ve set up some customizations for your PowerShell sessions, but there are some things that need to be configured at a deeper level. In the next section, you’ll be covering environment variables.
Environment variables are general-purpose key-value pairs that are available at many levels of the operating system. They typically contain information about how to run programs, or where to find resources. Python, for instance, runs differently if certain environment variables are set or not.
While you shouldn’t need to do much in terms of your own configuration as part of getting your machine set up, it’s always something that comes up sooner or later when troubleshooting. So it’s worth knowing your way around this topic.
PowerShell has access to environment variables and a lot of related functionality. If you’re interested in digging deeper, Microsoft has a page dedicated to these variables in the PowerShell documentation.
To see all the environment variables available to your current PowerShell session, you can navigate to a pseudo drive called ENV , just as if it were a drive like C or D :
Windows PowerShellPS> cd ENV: PS> pwd # alias for Get-Location Path ---- Env:\ PS> ls Name Value ---- ----- ALLUSERSPROFILE C:\ProgramData ANSICON 166x32766 (166x66) ANSICON_DEF 7 APPDATA C:\Users\RealPython\AppData\Roaming AZ_ENABLED False ChocolateyInstall C:\ProgramData\chocolatey . Once you’ve navigated to the ENV: pseudo drive, you can call ls to list all the environment variables available to your current PowerShell session.
Note: PowerShell, like Windows in general, is case insensitive. So a path or a variable like $PROFILE can be accessed with $profile too. ENV can be accessed with env . This also holds true for filenames and paths.
There’s also a Graphical User Interface (GUI) control panel for environment variables, which you’ll come to later in this section.
Environment variables are different from variables like $PROFILE because the environment variables are typically available to all programs in your user space, while $PROFILE is a PowerShell-only variable.
The Env:Path variable is particularly prone to easy mistakes and can be frustrating if you don’t understand what’s happening.
One of the environment variables you should become familiar with is the Path environment variable. Path is a variable that contains a list of paths to directories that contain executables. Path is kept by your system as a way to have programs always close at hand.
You can see the Path environment variable in action whenever you call choco or python from the command line, for instance. You know that the target executable may not be in the current working directory, but Windows can still start it.
For instance, Chocolatey adds a directory to Path where it puts executables that you might want to call from the command line. The directory it adds to the Path environment variable is C:\ProgramData\chocolatey\bin , and in that directory you’ll at least find choco.exe . With this set, when you call choco from the command line, Windows will search each path in the Path environment variable for a folder that contains a choco executable.
To see what paths are in your Path variable, from PowerShell you can call the following command:
Windows PowerShellPS> (cat ENV:Path) -Split ";" cat is an alias for Get-Content , which returns a string object of the contents of the Path variable. You can wrap that object in brackets to call the -Split operator to see each path on a separate line.
The list visible after running the previous command is the list of locations that your system will look for when evaluating which program to run. Once you have Python installed, the location of the Python executable will need to be added so that you can call python from anywhere.
Note: Watch out for having multiple possible choices for any given executable in Path . If, for example, you had a python.exe in two different places in Path , the one to run will always be the first one.
With some knowledge of environment variables and the Path variable, you’re now ready to learn how to make changes to them if necessary.
There are various ways to change environment variables—the most common being with the GUI control panel.
Open the Start menu and search for Edit the system environment variables, which opens up a System Properties window. In the Advanced tab, click on the button Environment Variables. There you’ll see User and System variables, which you’ll be able to edit:
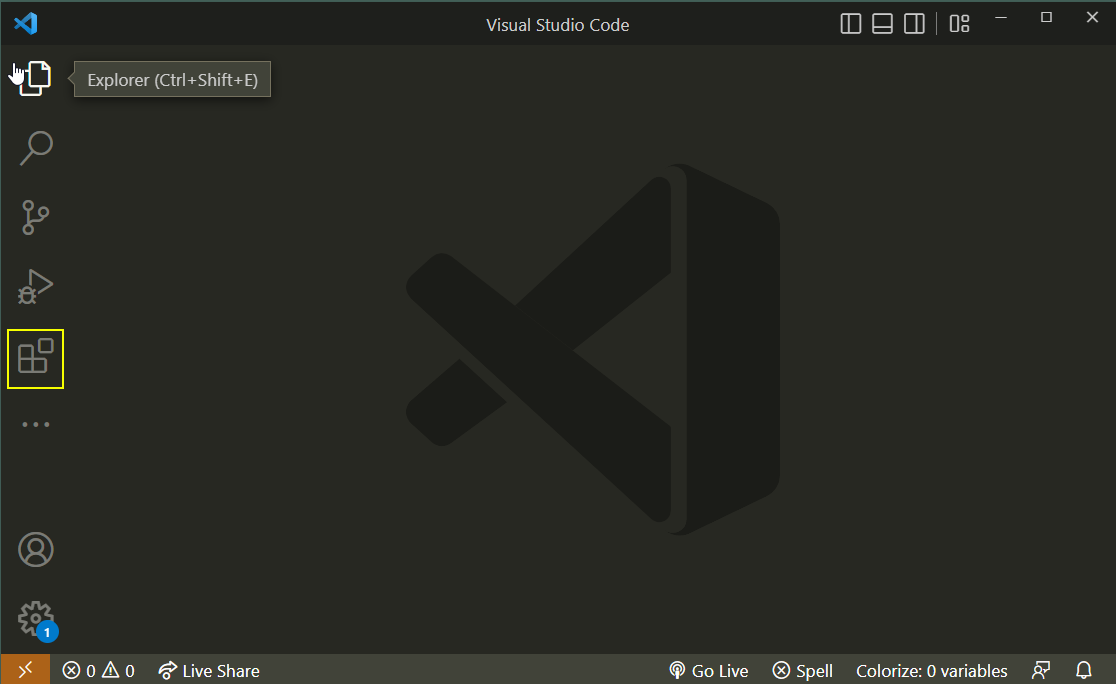
Then use the search box to search for the Python extension linked above.
The Python extension will provide you with IntelliSense for Python, which is a way for your editor to give you suggestions for autocomplete and will provide you a wealth of information in detailed tooltips.
Another extension, if you plan on using WSL, is the WSL connector, which will allow you to edit files as if you were running on Linux.
It’s also worth setting up Settings Sync, since that’ll link your VS Code settings and your extension list to your GitHub or Microsoft account, taking care of backup and making it fast to get set up on a new machine.
With VS Code set up, you’re ready to test your setup to ensure that it’s working.
Congratulations, you’re pretty much good to go. In this section, you’ll quickly test your setup to ensure everything is working correctly.
In the following snippet, you’ll test out creating a folder, creating a virtual environment, installing a package, initializing a Git repository, and making sure that VS Code integrates with that setup:
Windows PowerShellPS> mkdir test Directory: C:\Users\RealPython Mode LastWriteTime Length Name ---- ------------- ------ ---- d---- 27/06/22 18:19 test PS> cd test PS> pyenv versions * 3.10.5 (set by C:\Users\RealPython\.pyenv\pyenv-win\version) 3.9.12 PS> python -m venv venv PS> .\venv\Scripts\activate (venv) PS> python -m pip install requests Collecting requests . Successfully installed certifi charset-normalizer idna requests urllib3 (venv) PS> git init Initialized empty Git repository in C:/Users/RealPython/test/.git/ (venv) PS> ni test.py Directory: C:\Users\RealPython\test Mode LastWriteTime Length Name ---- ------------- ------ ---- -a--- 27/06/22 18:25 0 test.py (venv) PS> code . With VS Code now open, at the bottom right, you should be able to see which Python environment you’re in:
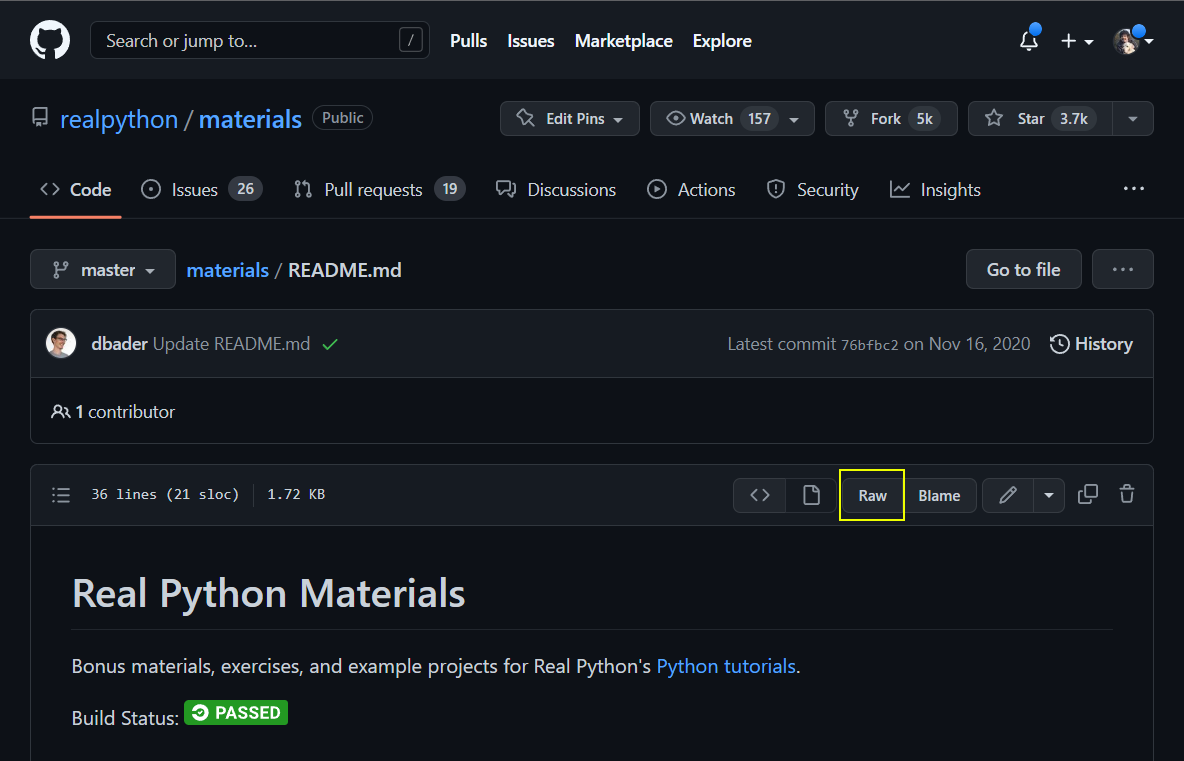
To get a raw link, navigate to the file that you want to use in GitHub, and when you’re looking at the contents of the file, you should be able to see a button that says Raw. This button will take you to a URL that looks something like this:
https://raw.githubusercontent.com/[USER]/[REPO]/[COMMIT_SHA_OR_BRANCH]/path/to/file Now you can use this URL to fetch the content and run it from your new machine. You can also host individual files with a GitHub Gist.
To take things a step further, to avoid having to type out the whole link, you can pass it through a URL shortener such as bitly, which will shorten the link:
https://bit.ly/xxxxxxx Now it’s time to do the main bulk of setup. Armed with this short link, all you have to do is disable the Python-related app execution aliases, start an elevated PowerShell session, and run the following:
Windows PowerShellPS> Set-ExecutionPolicy RemoteSigned -Force PS> iwr -useb bit.ly/xxxxxxx | iex Then everything will be taken care of for you, and you can run an errand while the installation process ticks along. Now that you’ve chosen your platform for hosting your setup script, you’ll need the actual script!
In this section, you’ll examine a sample installation script that’ll install some minimal dependencies that you’ll probably need to code with Python, especially if you want to contribute to open-source projects on GitHub.
The prerequisites for running this script are:
With those two tasks done, you’re just about ready to expand the collapsible box below and run the script:
Setup Script Show/Hide
PowerShell Script# setup.ps1 Write-Output "Downloading and installing Chocolatey" Invoke-WebRequest -useb community.chocolatey.org/install.ps1 | Invoke-Expression Write-Output "Configuring Chocolatey" choco feature enable -n allowGlobalConfirmation Write-Output "Installing Chocolatey Packages" choco install powershell-core choco install vscode choco install git --package-parameters="/NoAutoCrlf /NoShellIntegration" choco install pyenv-win # The Google Chrome package often gets out of sync because it updates so # frequently. Ignoring checksums is a way to force install it. choco install googlechrome --ignore-checksums # Google Chrome auto-updates so you can pin it to prevent Chocolatey from # trying to upgrade it and inadvertently downgrading it. # You could also add VS Code here if you like. choco pin add -n googlechrome refreshenv # The refreshenv command usually doesn't work on first install. # This is a way to make sure that the Path gets updated for the following # operations that require Path to be refreshed. # Source: https://stackoverflow.com/a/22670892/10445017 foreach ($level in "Machine", "User") [Environment]::GetEnvironmentVariables($level).GetEnumerator() | ForEach-Object if ($_.Name -match 'Path$') $combined_path = (Get-Content "Env:$($_.Name)") + ";$($_.Value)" $_.Value = ( ($combined_path -split ';' | Select-Object -unique) -join ';' ) > $_ > | Set-Content -Path "Env:$($_.Name)" > > Write-Output "Setting up pyenv and installing Python" pyenv update pyenv install --quiet 3.10.5 3.9.12 pyenv global 3.10.5 Write-Output "Generating SSH key" ssh-keygen -C john.doe@domain.com -P '""' -f "$HOME/.ssh/id_rsa" cat $HOME/.ssh/id_rsa.pub | clip Write-Output "Your SSH key has been copied to the clipboard" This script will try and install Chocolatey, install key software mentioned in this tutorial, install a couple of Python versions with pyenv, generate your SSH key and present it to you so that you can go to GitHub and add it to your account.
If you’re going to use it, be sure to customize the software you want to install and to swap in your email on the ssh-keygen line.
Make sure the Python app execution aliases are disabled, get the shortened link to the raw contents of the file hosted on GitHub as described in the previous section, and run the following command in an elevated PowerShell session:
Windows PowerShellPS> Set-ExecutionPolicy RemoteSigned -Force PS> iwr -useb bit.ly/xxxxxxx | iex With that, you should be ready and raring to go! The only optional steps left are to configure general Windows settings, maybe debloating and setting up your config files along the way.
Now you’ve set up your Windows machine to do some development with Python. You’ve explored some modern tools to manage your software and different Python versions. Not only that, you got a crash course in PowerShell and saw how you might start to automate an installation.
In this tutorial, you’ve successfully:
With this Windows setup, you’re ready to start coding with Python. Since you’re also connected to GitHub, you’re ready to try your hand at contributing to open-source projects, too. In the comments, feel free to share what you’ve been working on!
Free Bonus: Click here to get our free Python Cheat Sheet that shows you the basics of Python 3, like working with data types, dictionaries, lists, and Python functions.
Now that you have Windows all set up for Python coding, you may want to make your life even easier. Here are some great Windows utilities that can help you do just that:
With these utilities installed, you’re ready to tackle any coding challenge.
Mark as CompletedGet a short & sweet Python Trick delivered to your inbox every couple of days. No spam ever. Unsubscribe any time. Curated by the Real Python team.

About Ian Currie
Ian is a Python nerd who relies on it for work and much enjoyment.
Each tutorial at Real Python is created by a team of developers so that it meets our high quality standards. The team members who worked on this tutorial are:


Master Real-World Python Skills With Unlimited Access to Real Python
Join us and get access to thousands of tutorials, hands-on video courses, and a community of expert Pythonistas:
Master Real-World Python Skills
With Unlimited Access to Real Python
Join us and get access to thousands of tutorials, hands-on video courses, and a community of expert Pythonistas:
What Do You Think?
Rate this article:What’s your #1 takeaway or favorite thing you learned? How are you going to put your newfound skills to use? Leave a comment below and let us know.
Commenting Tips: The most useful comments are those written with the goal of learning from or helping out other students. Get tips for asking good questions and get answers to common questions in our support portal. Looking for a real-time conversation? Visit the Real Python Community Chat or join the next “Office Hours” Live Q&A Session. Happy Pythoning!